
You hired someone to clean your paver patio in May. By July it looks dirty again, weeds are pushing up between the stones, and a corner has started to shift. This is the most common paver story we hear in Bergen, Westchester, and Rockland — and the cause is almost always the same: someone cleaned the pavers and stopped there.
A paver patio, walkway, or driveway is a system. The pavers are the visible part. What holds the whole thing together is what’s underneath and what’s between the joints. Skip that second part of the job, and you just paid for a cosmetic touch-up that lasts a couple of months. Here’s the honest version from a NJ and NY metro exterior cleaning company — what paver maintenance actually involves, why sand and seal matter, and how to stop wasting money on half-jobs.
What’s Actually Between Your Pavers
Look at the joints between your pavers. That fine material packed between each stone is jointing sand — and on most modern paver installations, it’s polymeric sand. Polymeric sand contains a binding agent that activates with water, hardens, and locks the pavers in place. It’s what keeps:
- Weeds from coming up through the joints
- Ants and other insects from nesting underneath
- Individual pavers from shifting sideways under foot traffic, snow shovels, or freeze-thaw
- Water from washing out the base layer and creating sinkholes
- Edge pavers from migrating outward over time
Polymeric sand has a working life. In NJ, between sun, rain, snow, salt, freeze-thaw cycles, and pressure-washing damage, that life is usually 5–10 years before it needs to be redone. Sometimes less if your patio gets heavy use or sits under trees.
Why “Just Cleaning” Doesn’t Last
Here’s what actually happens when someone pressure washes your pavers without doing the full sand-and-seal job:
- The pressure blows the polymeric sand right out of the joints. Even moderate-pressure washing displaces a meaningful amount of sand. After a power wash, joints are partially empty.
- Weeds find the exposed joints within weeks. Bare or partially-bare joints are exactly the gap weeds need to take hold.
- Ants move in. Empty joints are perfect ant highways. Carpenter ants especially.
- Pavers start shifting. Without sand binding them, individual stones rock under weight. The patio loses that tight, flat feel.
- The dirt comes back fast. Without a sealer, the porous paver surface absorbs everything — dirt, oils, leaf tannins, tree sap. A sealed paver shrugs that off; an unsealed one drinks it in.
So you paid for a service. It looked great for the photo. Then in a couple of months you’re back where you started, except now you also have to deal with the weeds and ants and shifting that the half-job opened the door to.
The Full Paver Maintenance Cycle
A real paver service is three connected steps. Skip any one and the others get undone within a season.
Step 1: Clean
Remove the existing dirt, organic buildup, weeds, moss, and any old failed sealer. This is where most paver pros use a moderate-pressure wash. The key is balance — enough pressure to clean, not so much that you destroy what’s between the joints. We covered the broader pressure-washing decisions in our surface-by-surface guide if you want the comparison view.
Step 2: Re-Sand the Joints
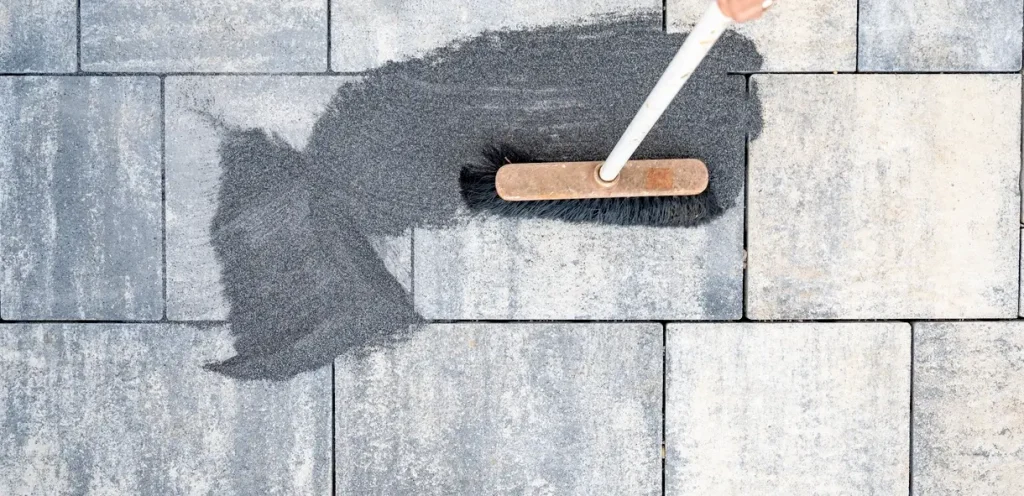
Sweep new polymeric sand into the joints, compact it down, and mist it with water to activate the binders. This is the step almost every DIY paver job skips. Done right, the new sand fills the joints, hardens, and locks the pavers back together.
Step 3: Seal
Apply a paver sealer — typically a water-based acrylic for most NJ patios. The sealer protects the paver surface from staining and UV fading, locks the polymeric sand in place, and gives the whole installation a uniform finish. Some sealers are matte (natural look), some are wet-look (richer color, glossier finish). The right choice depends on your pavers and what you want them to look like.
The NJ Freeze-Thaw Problem
This is what makes paver maintenance non-optional in our region. NJ winters cycle through freeze-thaw 50+ times a season. Water gets into unsealed paver pores, freezes, expands, and stresses the stone. Water gets into open joints, freezes, and lifts pavers out of position. A properly sanded and sealed paver installation handles all of that without issue. An unsealed one accumulates damage every winter.
The seal also makes spring cleanup dramatically easier. A sealed paver patio handles the salt residue from winter, the pollen wave in April, and the tree sap of early summer without staining. Pair the spring paver service with the rest of your spring home exterior cleaning and the whole property comes out of winter looking like the day it was installed.
When to Do It
- Best window: Late spring through early fall. The polymeric sand and sealer both need a dry curing window (usually 24–48 hours). Aim for a stretch of dry weather.
- Avoid: Late fall through winter. Cold temps prevent sealers from curing properly, and rain or snow during the cure ruins the job.
- Frequency: Most NJ paver installations need a re-sand-and-seal every 3–5 years. Cleaning alone can happen more often — once a year is fine — but the seal is the big-cycle work.
Signs Your Pavers Need It Now
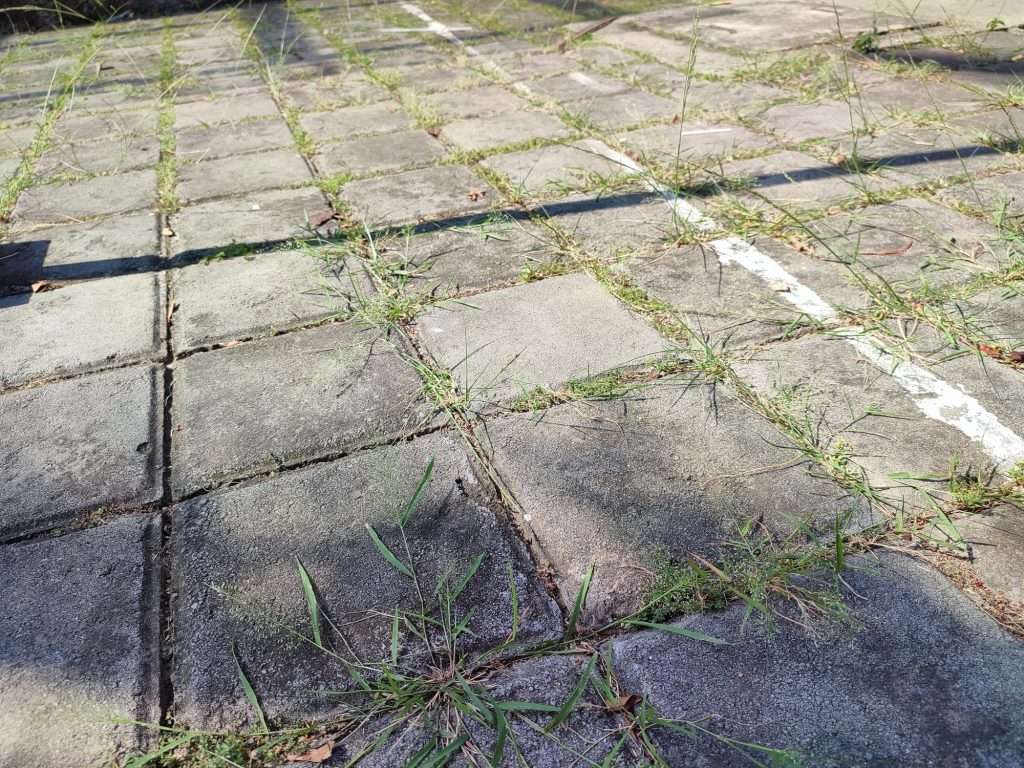
- Weeds growing between pavers (any amount)
- Ants visibly emerging from joints
- Pavers that wobble or shift underfoot
- Visible gaps in the joint sand
- White haze (efflorescence) on the paver surface
- Dark staining that won’t wash off — oil, tannin, mildew
- Edge pavers that have migrated outward, leaving gaps
- Sunken low spots where water pools
Any one of these is a sign the system has failed somewhere. Multiple is a sign the full clean-sand-seal cycle is overdue.
DIY vs Professional
You can DIY a paver service if you’ve got the right equipment, time, and patience. Where it usually goes wrong:
- Power-washing too aggressively (blowing sand out of joints, etching the paver surface)
- Skipping the re-sand step because the joints “look fine” (they’re not)
- Applying sealer over still-wet pavers (haze, milky finish, the whole job has to be redone)
- Using the wrong sealer for the paver type (some pavers need penetrating sealer, not topical)
- Sealing during the wrong weather (rain on a 6-hour cure ruins everything)
The U.S. OSHA hand and power tool guide covers the equipment-safety side, but the harder part of paver work is judgment — knowing when to stop pressure-washing, what sand to use, what sealer matches the paver, and when the weather will cooperate.
For most homeowners with a 200+ square foot patio or any meaningful walkway/driveway, a pro service is the better economic choice — once a service done right lasts 3–5 years, vs a DIY pass that often needs to be redone within one.
Ready to Stop Wasting Cleaning Money?
If your pavers have been cleaned every year and the weeds and ants still come back, the issue isn’t the cleaning — it’s the missing sand and seal step. Our paver sand seal service covers the full clean-sand-seal cycle across Bergen, Essex, Passaic, Rockland, and Westchester, and is often bundled with power washing for the rest of the home exterior. Request a free estimate and we’ll walk through your patio or walkway and tell you whether you need the full cycle or just a refresh.